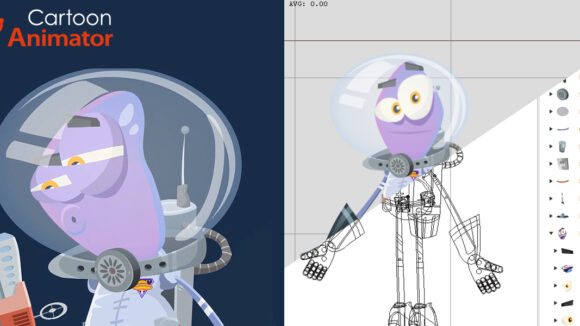
How Vector Art Makes Your Cartoon Animator 5 Characters Look Better
G’day! My name is Garry Pye and I have been a content developer for Cartoon Animator’s 2D Marketplace for the past nine years.
I’d like to introduce Cartoon Animator 5, which delivers a new set of amazing and practical tools like object Free Form Deformation (FFD), Spring Bones, and most importantly, the ability to create characters using vector software.
For this article, Cartoon Brew has invited me to take you on a tour of some of the new tools and features Cartoon Animator has to offer.
Vector-Based Character Design
Cartoon Animator 5 introduces the ability to design and build your characters as vector art in your favorite drawing software, including Adobe Illustrator, CorelDraw, Affinity Designer, Photopea, and Inkscape.
Unlike raster art, which is made up of pixels that can blur when enlarged or zoomed, vector graphics are created from geometric shapes like points, lines, curves, and polygons, which means you can enlarge them indefinitely without any loss of quality and without any annoying feathering around the edge of your art.

With a drawing tablet, you can still freely draw your art, but as vectors you have the ability to make instant changes to shape and color, meaning changes to your design can be made spontaneously, as opposed to working with raster images which need to be completely redrawn.
As you are creating your new vector character, you are going to want to make sure all your color environment is RGB mode. This way, users will have the chance to change the color of individual parts of their character like skin, hair, and clothing, directly inside Cartoon Animator 5.
As you build your character, remember to group all your body parts like arms, legs, and torso for easy management, and name them the same as the corresponding body part in the Cartoon Animator 5 character template to import your finished character straight into CTA.
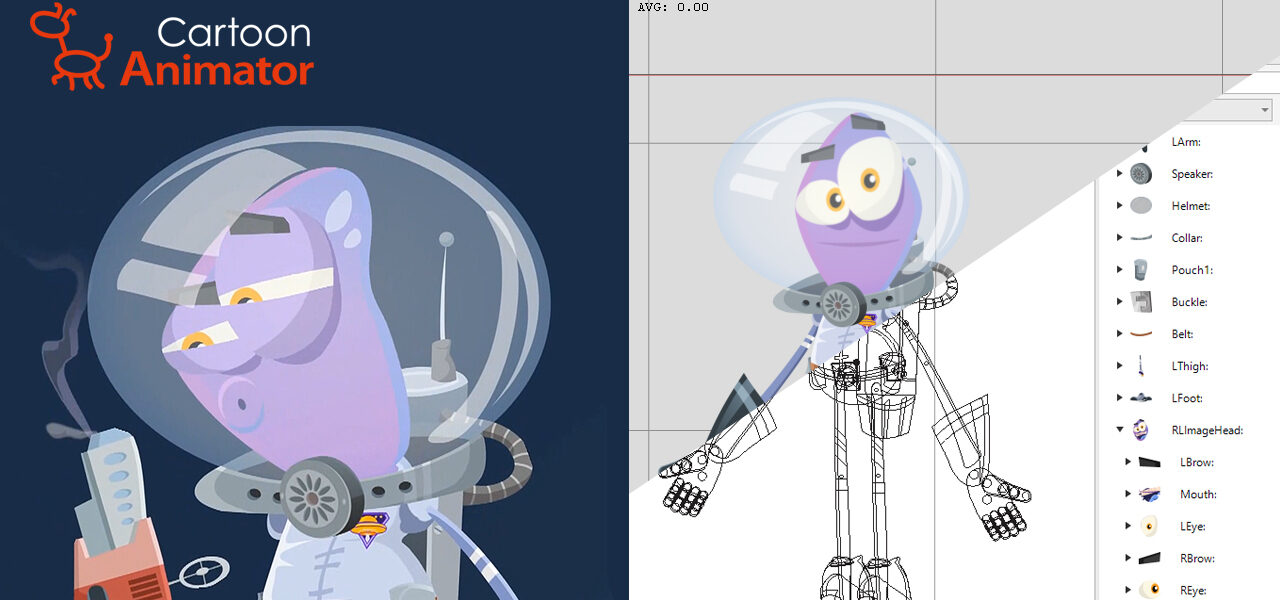
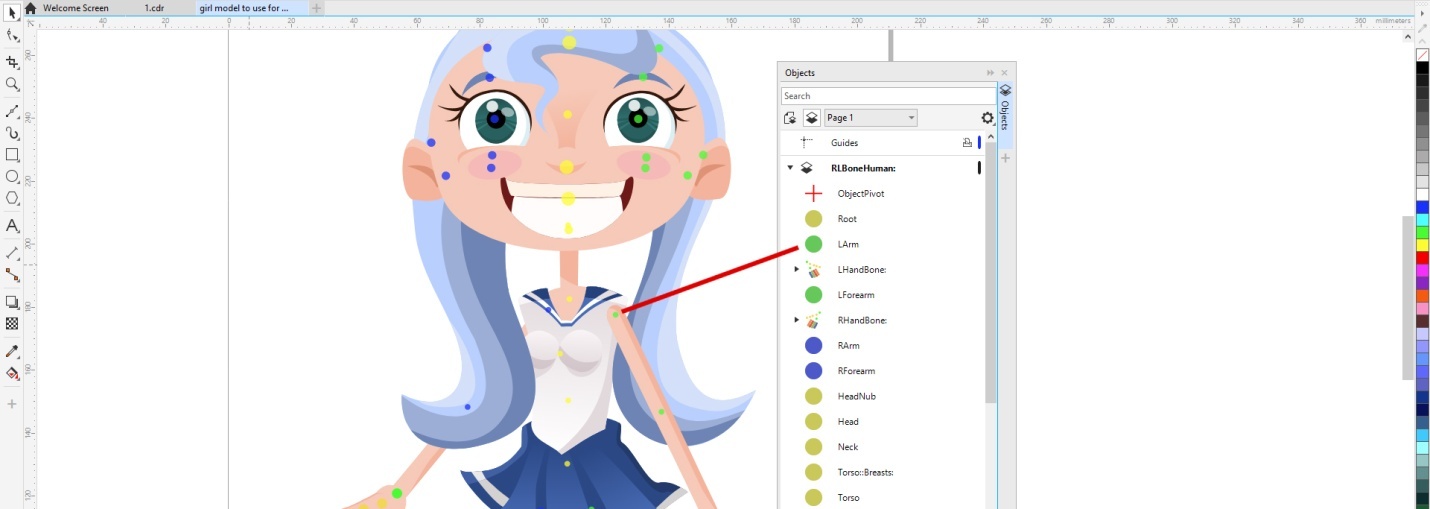
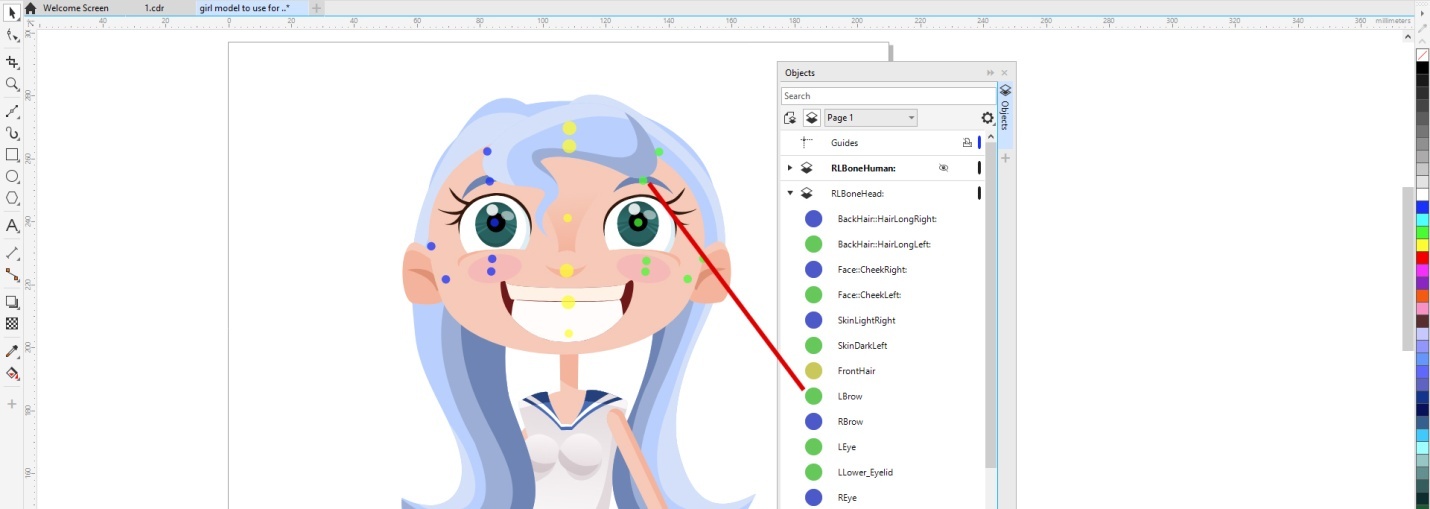
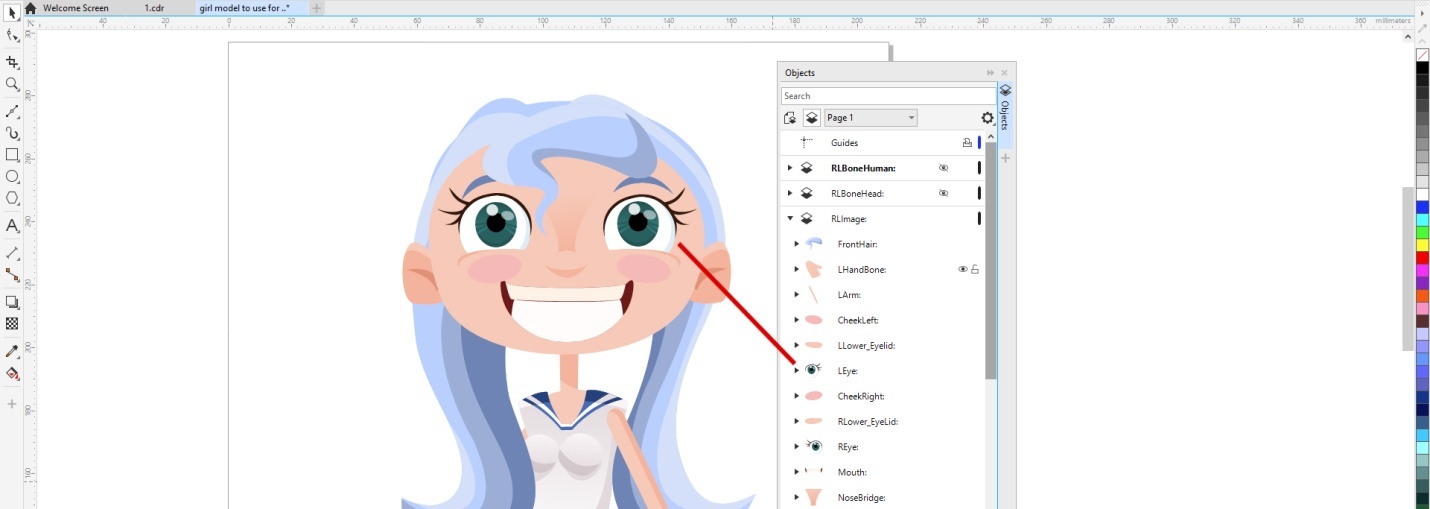
Keep all your parts grouped together to match them up with the character template so they work in CTA5. Then it’s time to assemble your character using the bones that will control movement. The number one rule here is: Make sure your layers are named correctly. You have three main folders that make up a character build, and they are RLBoneHuman:, RLBoneHead:, and RLImage.

First, the RLBoneHuman: folder contains all the pivot points for the bones of the body. You can position these any way you want to create your own unique skeletons for your characters.
Next is the RLBoneHead: folder containing the pivot points for the individual parts that make up the face. These are important because they determine how the head rotates for your 360 head movement.
And finally, we have the RLImage: folder which contains all the actual drawn parts of the face and body. Everything in here needs to be layered in the correct order so all your characters’ faces and body parts appear in front or behind each other as required.
Now you have your character all drawn up, it’s time to send it in to Cartoon Animator 5 and bring it to life!
Export your new character as an SVG file, which is your Scalable Vector Graphic. Make sure your Compatibility is set to 1.1 and your Styling Options are set to Presentation and you can export your character.
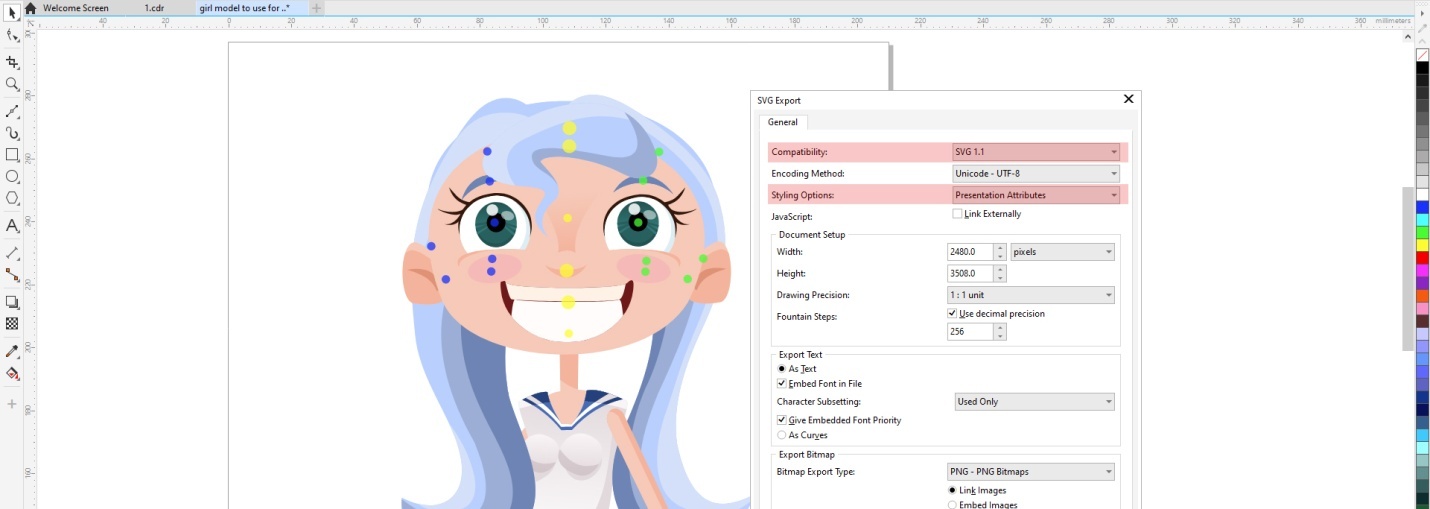
Move across to Cartoon Animator 5 and drop your SVG file into Stage Mode. Now you only need to set up your 360 Head movement.
Object Free Form Deformation (FFD)
New to Cartoon Animator 5 is Object Free Form Deformation (FFD). This is the ability to apply squash and stretch to your characters to exaggerate movement and give them a flexible feeling.
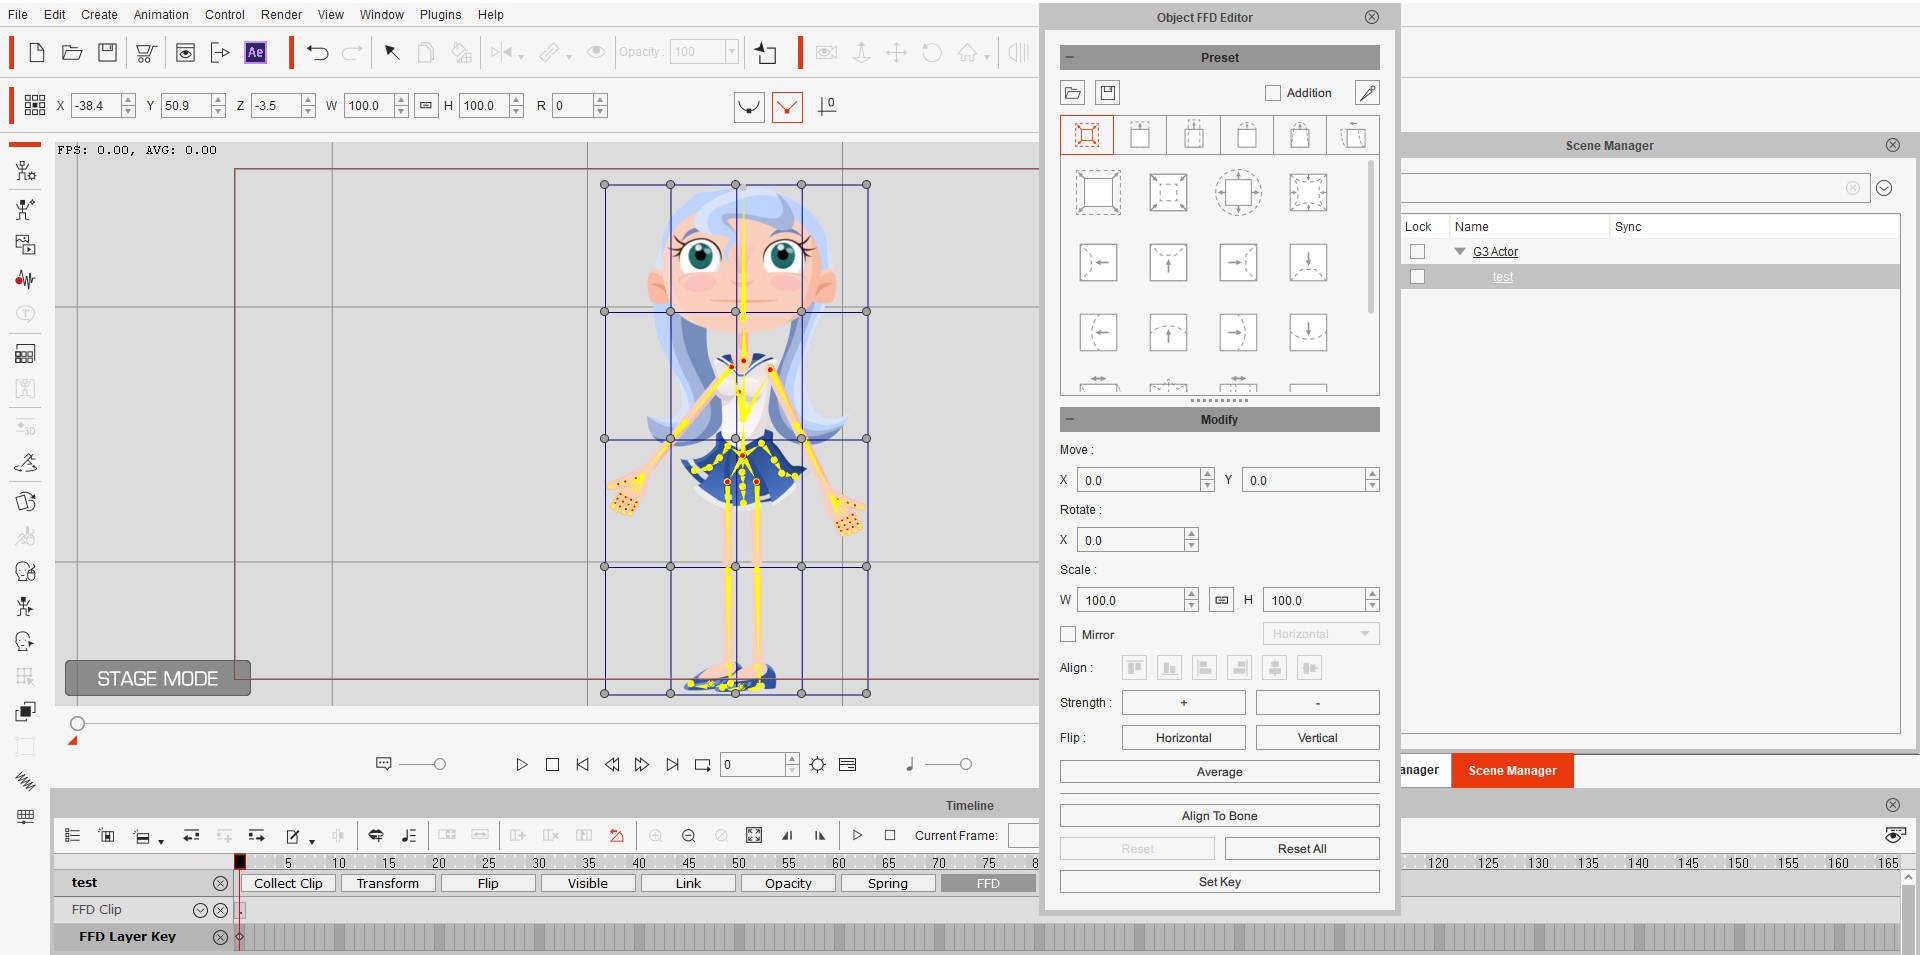
Once you have animated your characters, you can apply Free Form Deformation. On your character’s Timeline, you will see a tab labeled FFD. Open this track and this is where you will see the Free Form Deformation as it is applied. Select your character and open the Free Form Deformation menu. Now you will see a bounding box surrounding your character. You can move each of these points to affect the squash and stretch to your character and manually keyframe its movement, or you can apply one of the preset deformations. You can rotate, shift, scale and adjust the strength of the deformation to get your animation just the way you want for a more cartoony performance.
Spring Bones
Another new feature for Cartoon Animator 5 is Spring Bones. Think of Spring Bones as being able to automatically apply physics and gravity to your characters’ body parts. With Cartoon Animator 5’s Spring Bones, character parts can move freely, as the Spring Bones will automatically control their movement. There is no keyframing involved.
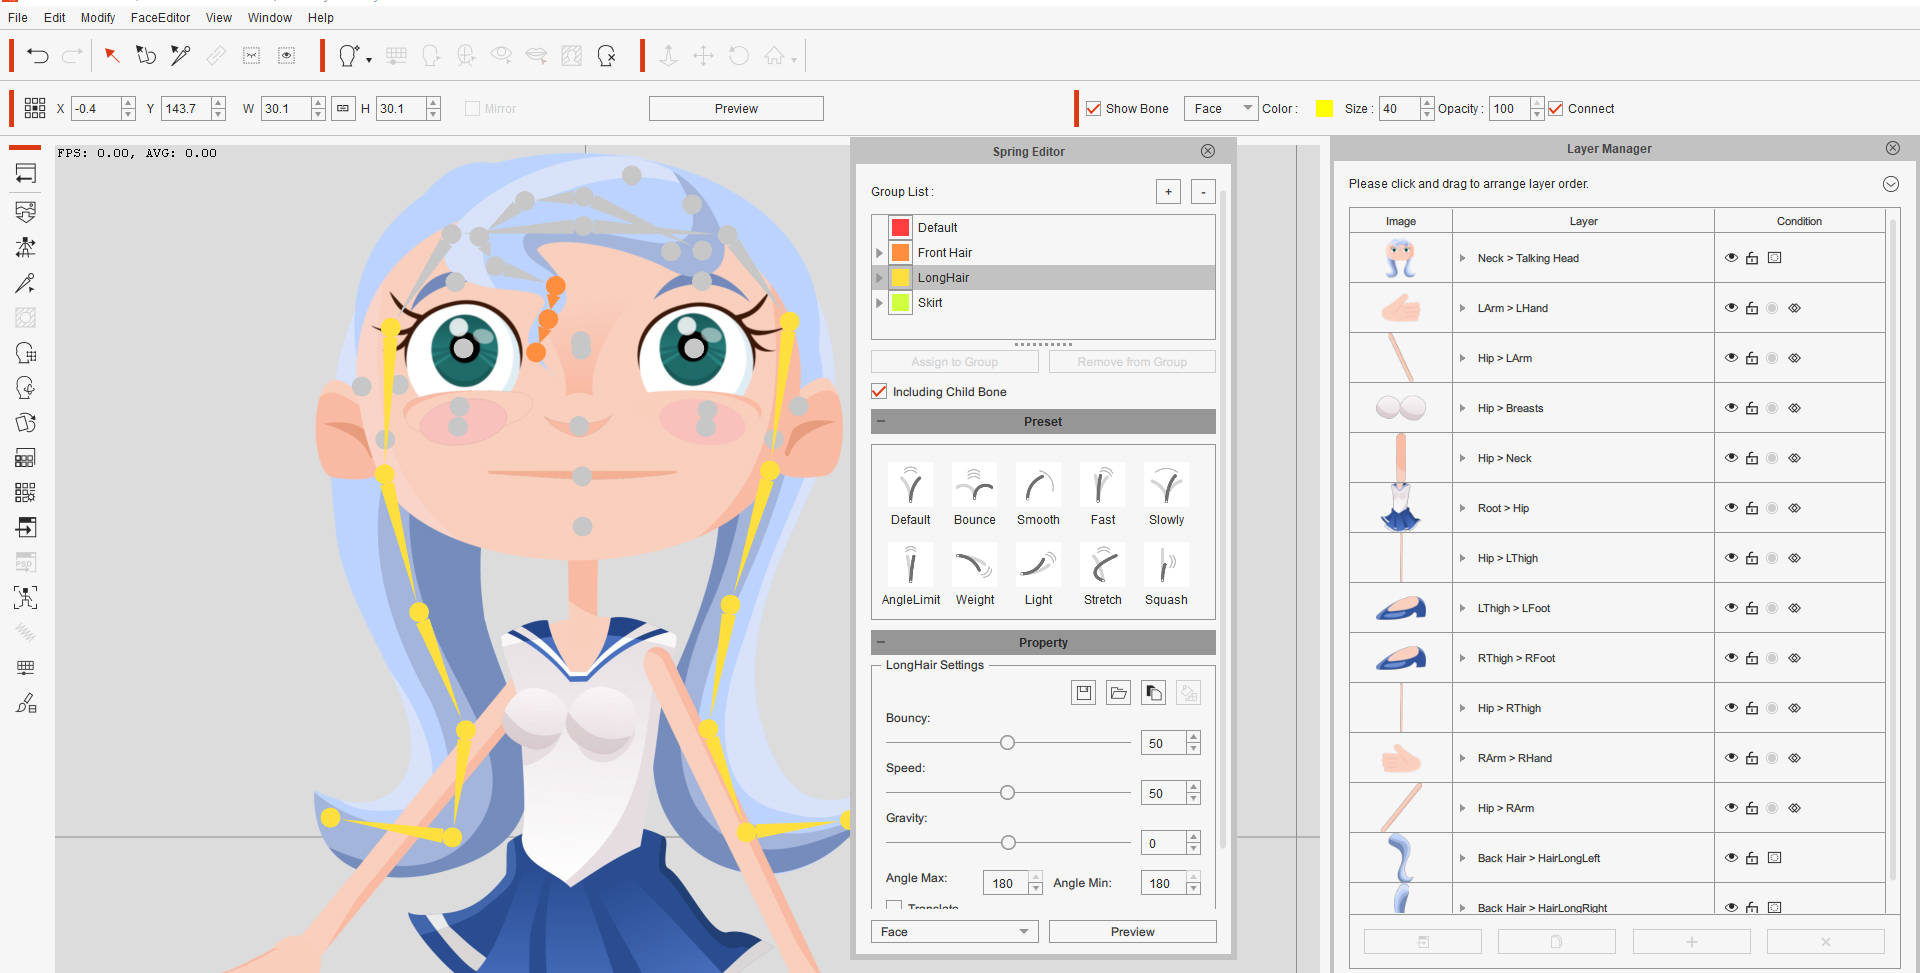
With your character open in Composer Mode, open the Bone Editor. Select the bone pivot point to which you want to apply your Spring Bones. Now add new bones starting from this point.
You can do this to any face or body part. Then open the Spring Bone Editor, create a new group, and assign the bone to that group. When you do, you will see all the bones attached to this bone are added to the group and they will all change color. Now click Preview and watch as your hair moves naturally on its own.
How good is that? No more tedious keyframing. No more unnatural, stiff movement. You can apply Spring Bones to any face or body part. Anything that you want to move naturally including hair, clothing, tails, or trunks.
Conclusions
So, there you have it, just some of the new features available in Cartoon Animator 5 that are designed to enhance character performance through natural, automated movement, like squash and stretch, as well free flowing movement with Spring Bones.
Cartoon Animator is already powerful animation software designed with both the beginner and professional in mind, with new features that will bring characters to life in exciting new ways!
And for more tutorials, check out my latest Vector content for Cartoon Animator 5 here .

